RoverWing Top Features
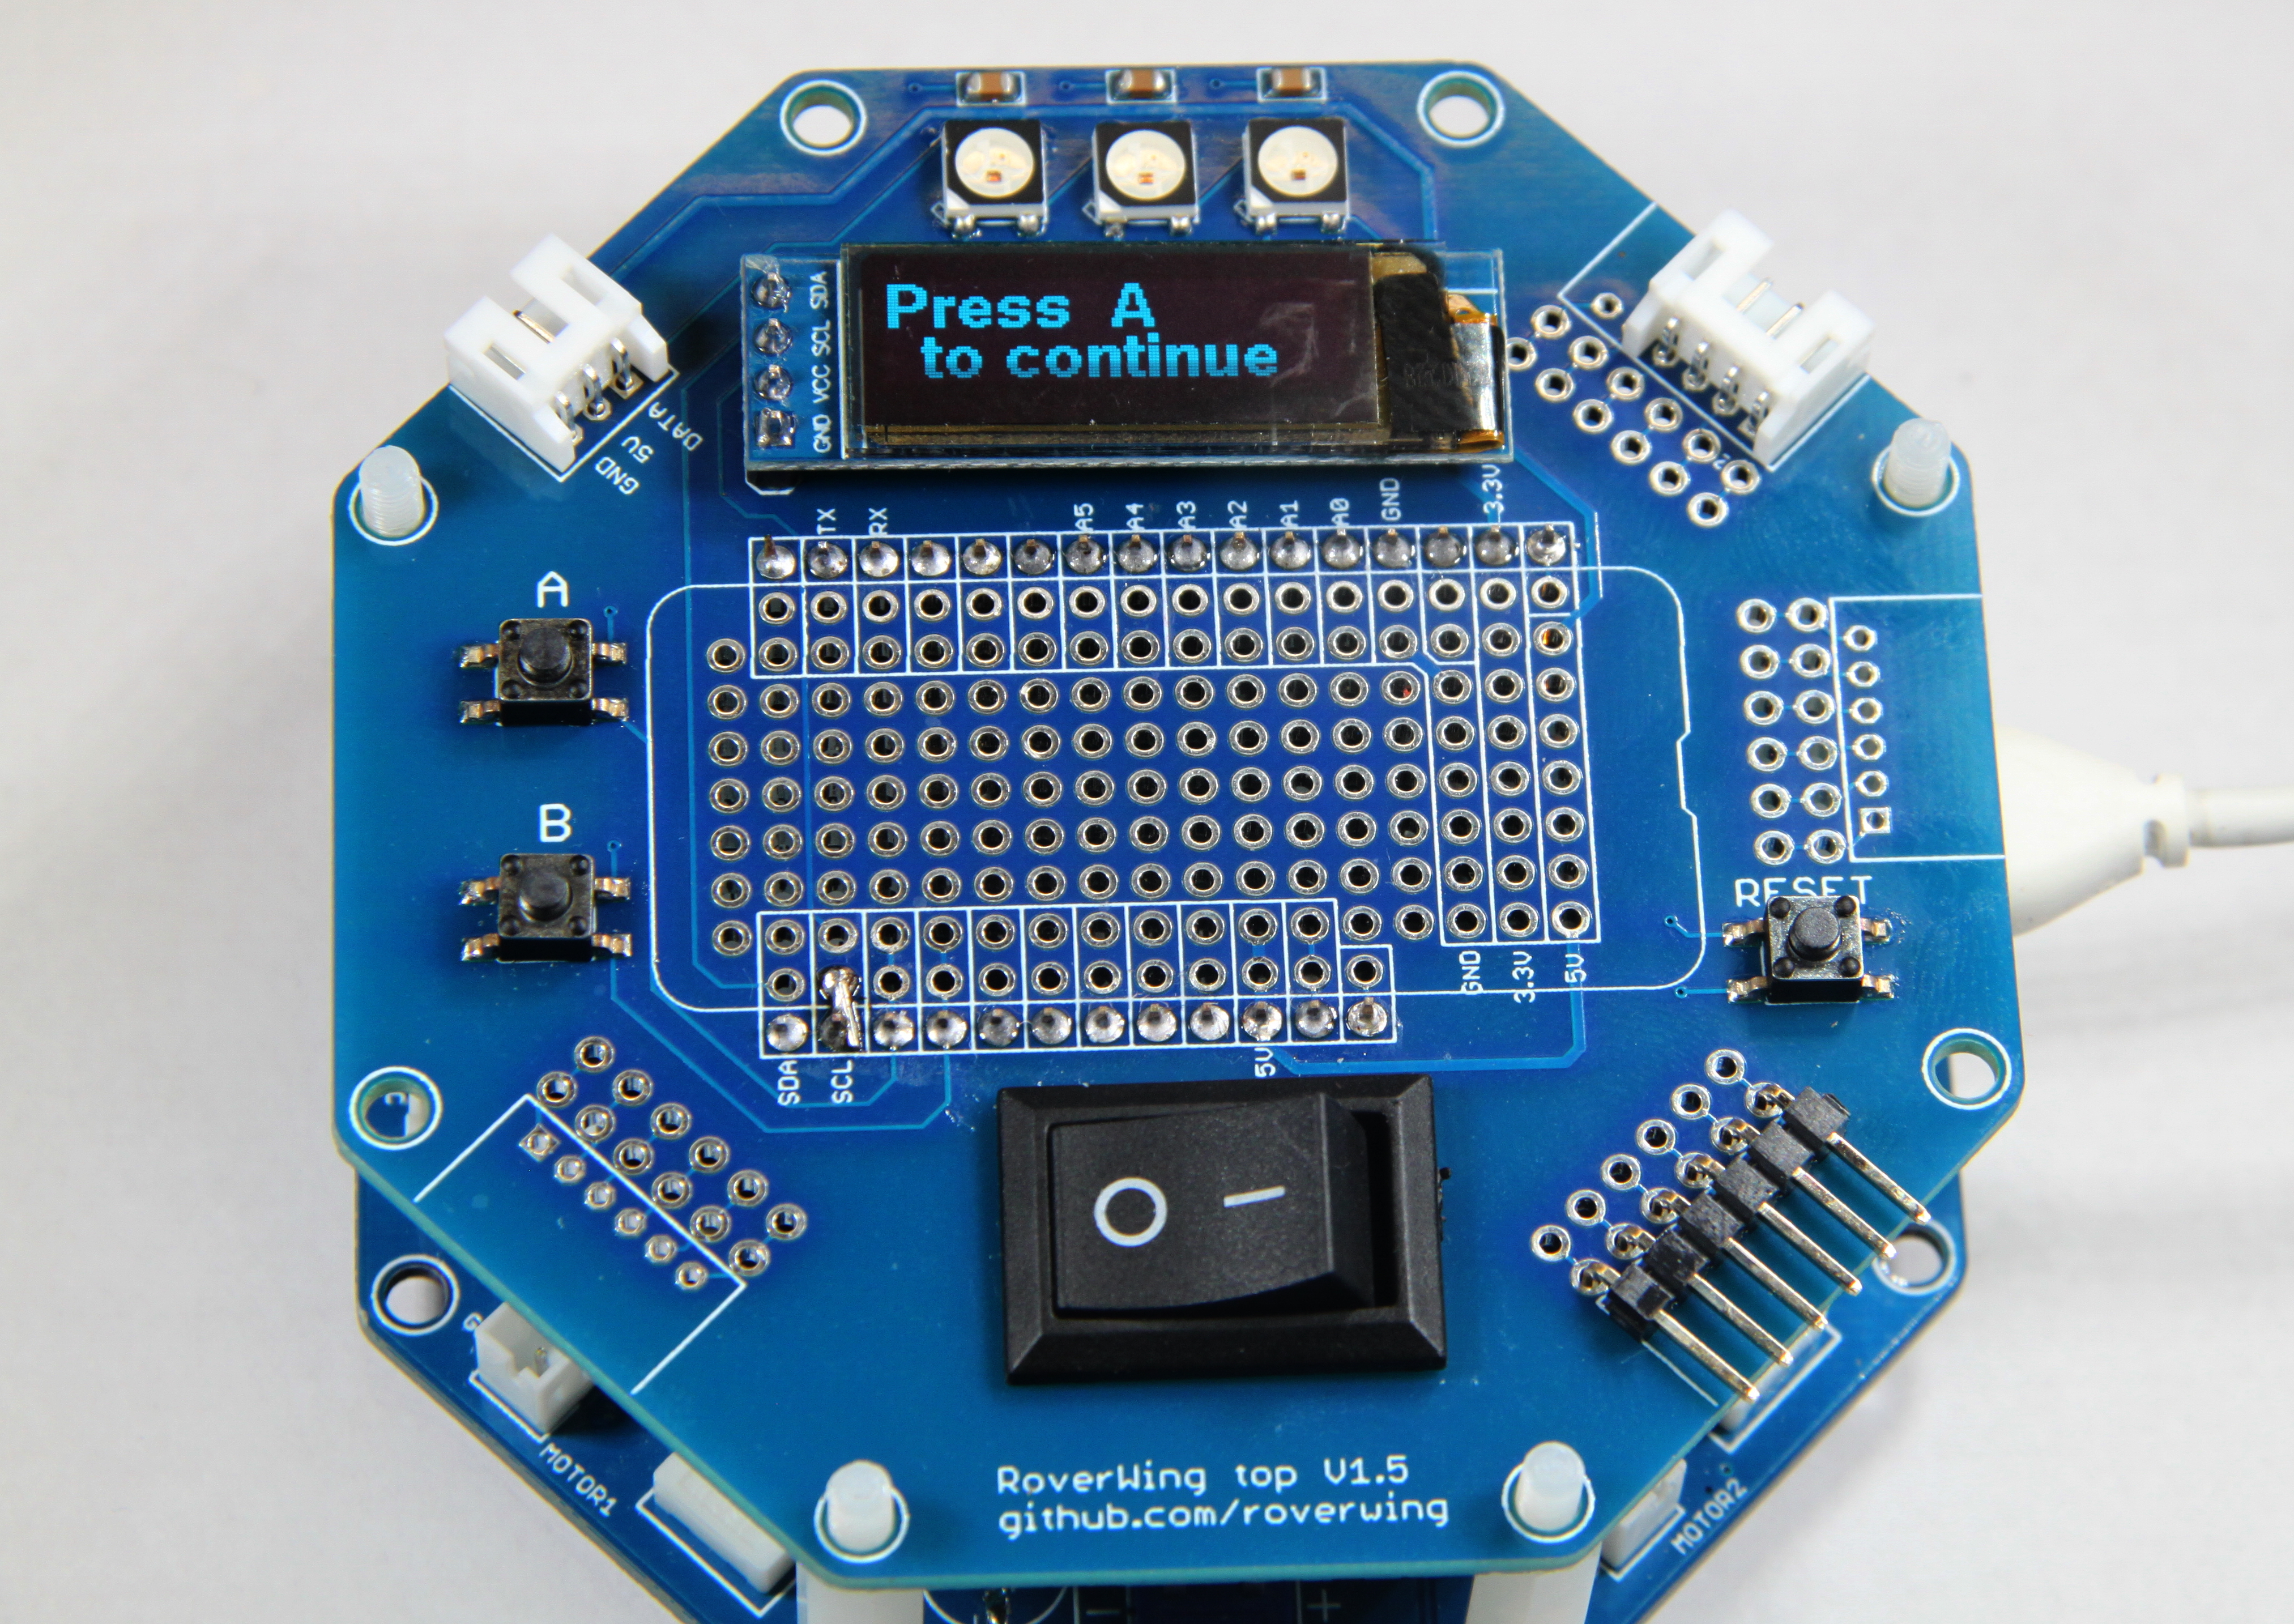
RoverWing board with the top attached.
Below is the list of features provided by RoverWing Top. Please see the RoverWing Library Guide for information on accessing and using these features in your sketches.
- Power switch
- Reset button. Pressing this button resets both the Feather board and the RoverWing.
- Two buttons that can be used for user input. These buttons are connected to two pins of the Feather board: button B is connected to the pin next to SCL, and button A, to the next pin.
- Graphics display: a small (0.91 inch) monochrome OLED graphic display based on SSD1306 chipset. This display has 128*32 resolution - enough for up to 3 lines of text (you could try and put 4 lines, but it would be barely readable). It is connected directly to the SDA and SCL pins of Feather board and you can use a library of your choice to control it.
- NeoPixel LEDs: the top contains three NeoPixel LEDs, each of which can be programmed independently. In addition, the top contains a port for connecting additional NeoPixel LEDs. The port uses the same connector as the NeoPixel port on the RoverWing board, as described in NeoPixel section.
Warning
When using RoverWing top, do not connect NeoPixels to the NeoPixel port of the RoverWing board itself — instead, use the port on the top.
- A small prototyping area, providing connections for all the pins of Feather board (except USB and VBAT), and 5V power rail of the RoverWing.
- Holes for additional headers/connectors along the edge of the RoverWing top, which can be used to connect additional sensors and other peripherals. Each group of holes allows soldering either a one-row header with standard 0.1” pitch (straight or right angle), or a 2mm pitch connector such as JST PH or Grove. (The photo above shows a 6-pin right angle 0.1” header and a 4-pin JST PH header on the left side of the board.)
Note
A drawback of using the RoverWing top is that connecting/disconnecting motors and sonars is only possible when the top is removed - so plan ahead. The USB port of the Feather board can be accessed, but it is harder with the top attached; if you need to connect/disconnect the USB cable frequently, it is advised that you permanently attach a short USB extension such as this one to the Feather board. This also helps to reduce the wear on the USB port of the Feather board.